Monday, November 13, 2017

18th finish for 2017 and how to do the partial seam

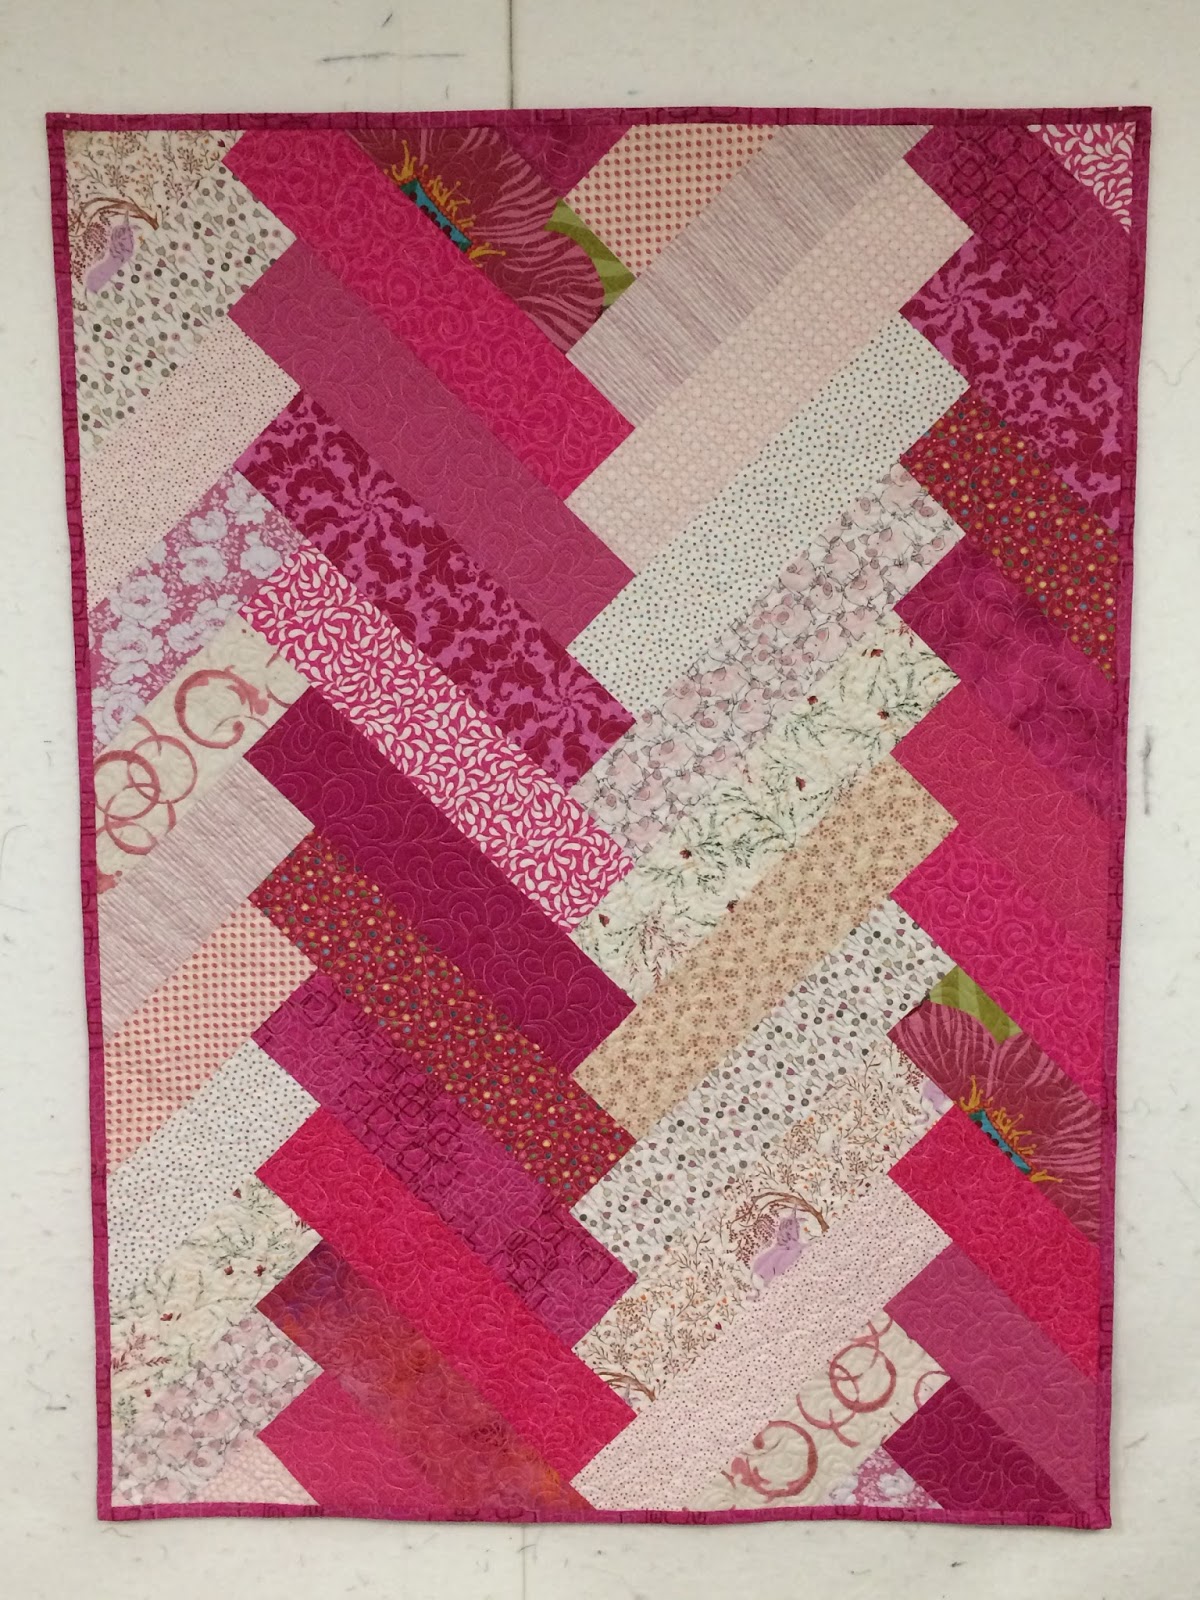
Here it is - another finish. It turned out 44" x 53".

I used three colors of quilting thread

Isn't interesting how these two quilts look so different even though they were made the same way?

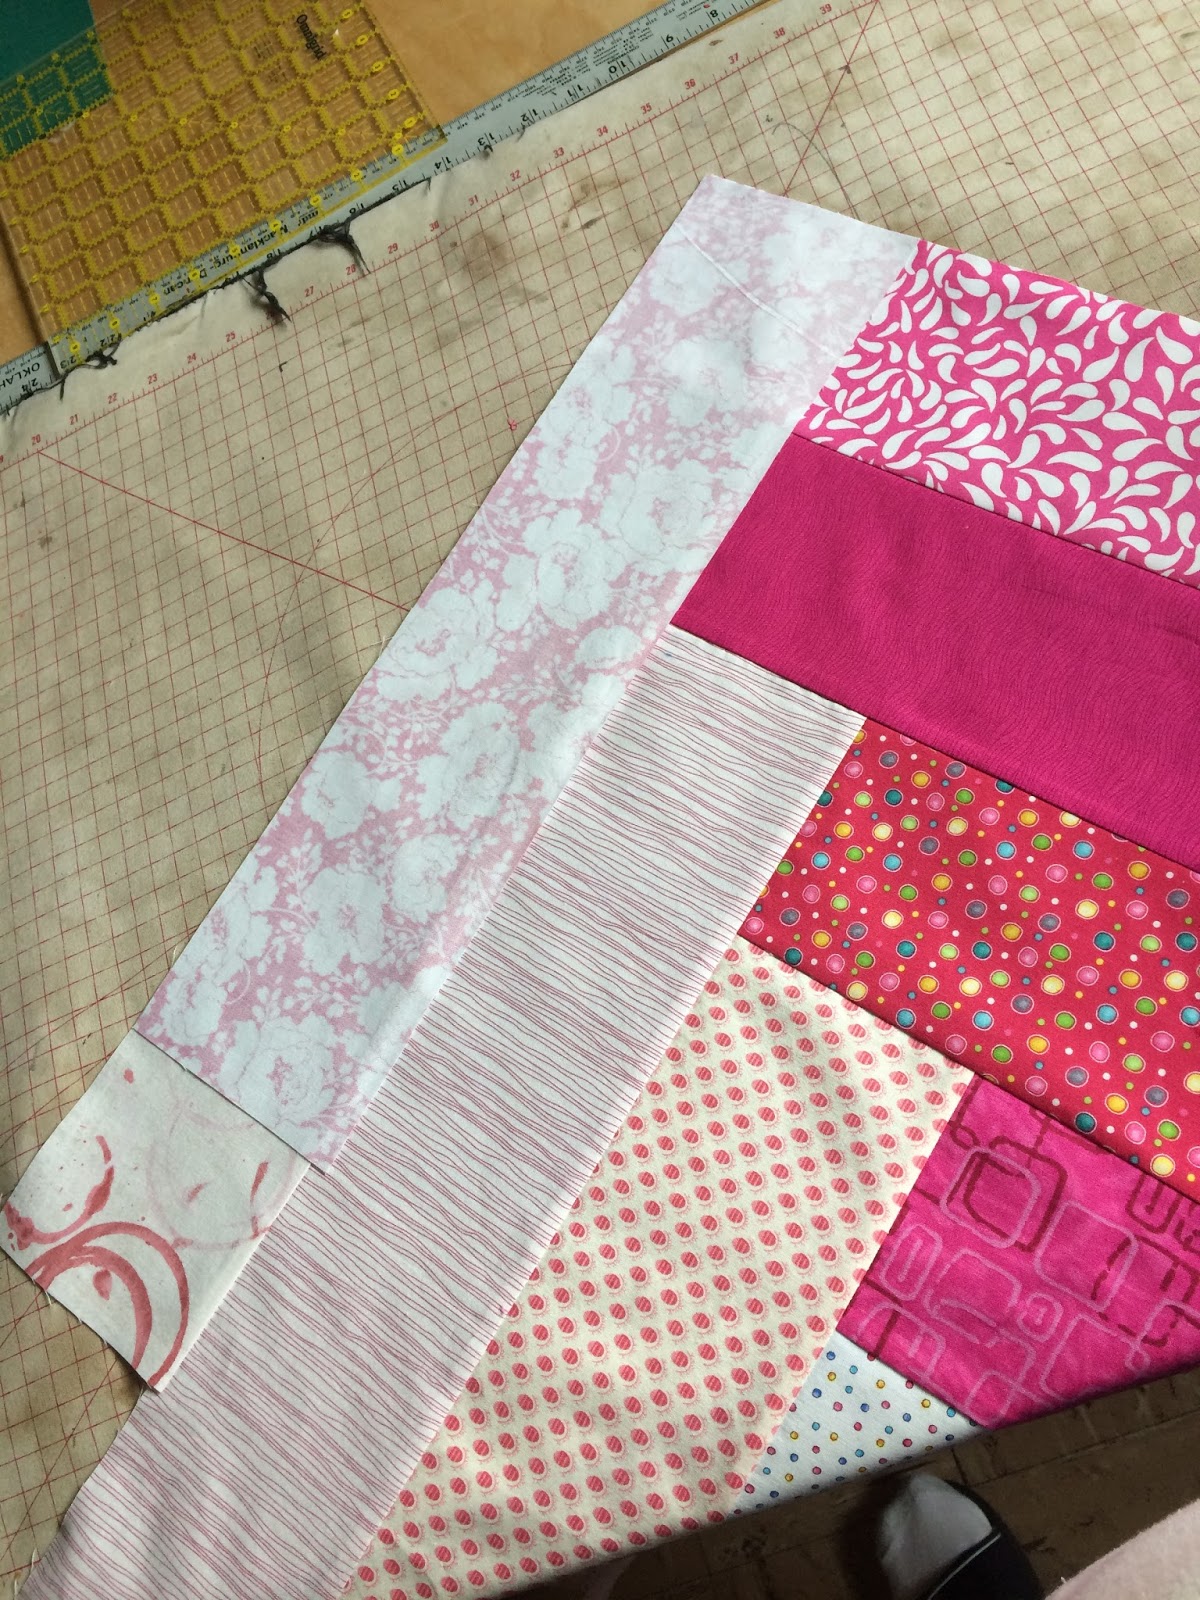
Here is how to sew the partial seam. Here is the quilt top before. You start sewing it together from the top.

Once you sew the first seam the rest just falls in place. I marked my first seam to sew with tape for you.

Here it is sewn

The next piece to sew is that lattice looking fabric

When I lined the fabric up - I always sew from the seam to the raw edge - the lattice fabric was a bit longer. No problem, I will just trim that off after I sew the seam

Next piece to sew is the thin striped fabric. I just put wrong sides together and sewed

I do press as I sew each seam. The next seam is the circle stain fabric. As you can see each seam just falls into place.

Friday, November 10, 2017

Looking so much better!

I spent 3 hours working in the garage again and I feel like I am finally starting to make a dent in the mess! I worked on the left side and it looks so much better! Here is the before

And here is the after. Again I tried to be brutal and get rid of stuff either trashing it or putting in the donate pile. The bin on the right is empty with four other boxes that are now empty!

Two things I found that I want to know if there is someone out there is interested in. I have the ruler and book for the Square in a Square method of piecing - never used! I would be glad to pass it on for the cost of shipping.

The other thing I have is a vintage beaded purse. Some of the beads are falling off the strap, but otherwise it is in good condition. Maybe someone could repair it. Again for the cost of shipping I would be glad to pass this on to someone. I remember bringing this home when I helped my parent clean out my Dad's mother's house. I have no knowledge of its history.


I did work on the herringbone quilt this morning before work. I have a couple more tips for you in case you might be interested in making one of these. It gets to be a challenge to move the row back and forth to the sewing machine once it starts getting longer so I folded up and pinned the sewn rows. This makes it much easier to move.

See the small piece at the top of the left column?

I wanted to make sure the quilt was long enough and so I added this small piece. If I had added a full sized piece, most of it would be cut off when I trimmed the quilt and I only had a couple of 4.5" squares of this fabric which I sewed together to make it big enough. To figure out where to sew the small piece I measure the off set of the previous row

Then I off set the small piece that distance

Here is the left column all sewn together. I pinned up a measuring tape so you could see how and why I added this small piece. Doing this I realize I need to do the same thing to the top of the far right row.

Look at the size of this leaf I found in my yard from the neighbor's tree! Glen, you need to print with a leaf this size LOL!!!!


I have a lot I want to get done this weekend; a list longer than humanly possible, but I will give it my best shot! Have a great weekend!

Thursday, November 9, 2017

Progess on several fronts

I took a little bit of time off work yesterday to do some things around the house. Number one on the list was the straighten out the garage. I had took home a lot of stuff from the trailer so I would have it for the next job I get assigned to, but since I had been sick with that cold I just dumped it in the garage. I could hardly get my car in so it was time to spend the time to clean it up. I got it about half done which I thought was pretty good. I tossed out some stuff and did a lot of reorganizing. I have wire shelving on the back wall of the garage and the top row contained boxes and boxes of my son's baseball cards. I didn't want to be one of those Mothers that threw out her kids cards so I have been hanging on to them, but now my son will be moving into a house and it is time to hand them over. I took all the boxes down and then put all the boxes of offices supplies in their place. Here is the right side of the garage before and after. It was hard to get a good before picture with the sun shining in. I think this side looks much better!

The other side of the garage is still quite a mess. I did get some things move out, but there are boxes of stuff that I have for the Habitat Resale store. I did have to move some stuff so I could get the mower out.

after/in progress
I had started all of this at 2:10 and by 5 it was starting to get dark and I wanted to get the front mowed. After mowing and talking to my new neighbor I finally went inside at 5:45. I will attempt to get the rest of the garage cleaned up in the next two days so I can call the Habitat truck to come and pick up my donations.

I did get a few more pieces added to the herringbone quilt.

Wednesday, November 8, 2017

A bit of progress on the next prototype

After gathering up the recycling and trash for pick up today, I got to work putting labels on two quilts for the fellow that I made the feed sack quilt. He just had a baby grandson so I said he needed a quilt for him and his 4 year old sister. These are the ones they are getting


I was up early this morning. I slept terrible last night and I woke up at 4:40, but I didn't get out of bed until 5:15. I was laying there thinking of all the stuff I should be doing. When I did finally get up I washed dishes (by hand), took a shower, then I got five pieces sewn together on the next prototype herringbone quilt. See the ones on the lower left?

Tuesday, November 7, 2017

Going deep

I am working on my second prototype for a baby herringbone quilt. Here is what I had at the beginning of my evening last night. My goal for this one is to figure out how I could incorporate the medium fabrics.

As I was cutting fabric I realized I needed more lights and mediums so I dug out my scrap box labeled PINK. I did find a couple pieces that were big enough that would work

But then there were several pieces that were not big enough so I did what women have done for a long time; I sewed the pieces together to make it big enough. Once the quilt is quilting no one will ever see the seam

I still needed more fabrics. I am trying not to repeat a fabric so I decided I needed to go deep, deep into my tubs of scraps to see what I may have. Here are most of my scrap tubs and I drug out one more after I had taken this picture; yes I still have a couple more I didn't bring out!

I decided to go thru the two smaller containers of print fabric first and sort by color. I set the solids fabric container aside and added to it. This is going to be a big job sorting years and years of scraps! I tried to be brutal and toss the stuff I know I would never use. Some of the scraps were from my Mom. I dug thru the larger bins giving a quick look to see it there were any pink fabrics. This will be a good job to sort these when I am watching Live PD on Friday and Saturday nights. So now here is the current status of my scraps

In the meantime I kept cutting fabrics and here is what the next herringbone quilt will look like

I have a bunch of pieces still that I cut that I can use for the next quilt. I think I will have to change up the color story a bit since I don't have many lights left.

When I was digging thru the pink scraps I found this piece made with cotton squares alternated with linen squares. It is only 20" x 26.5". I will have to finish this. I like the way it looks.

Monday, November 6, 2017

17th finish for 2017

I stayed home all weekend and only peaked out of the house to see if there was any mail. I spent my time working on the prototype pink herringbone quilt and got it done. It turned out 40" x 54.5" because I trimmed the side down so I could used regular yardage on the back. I had to cut off 4" on each side after I had trimmed off the points. I used warm & natural batting and quilted it with Baby Pink Essentials thread.

I had cut my pieces 4.5" x 18.5". It took me an hour to sew each half together and a half hour to sew the partial seams down the middle. I think that is quick for a baby quilt that looks like a lot more work went into it. Here is a bit of the process I did:

I stated sewing from the bottom. I sewed the light colored piece to the dark colored piece and press the seam toward the light colored piece. Here I am getting ready to add the next light colored piece.

Every time I added another piece I would lay it in place as shown here where I have the light colored piece on top.

Then I pressed the light colored piece down to make it stick a bit to the previous piece. I am not one for pinning much and the friction between the two pieces was enough to hold the fabric in place. My machine has an integrated walking foot so I don't have to worry about the top fabric being pushed.

Now one this row when I sewed the pieces together the row of light fabrics was the outside row so I sewed all the way to the end of the piece. The dark row was the partial seam section so I only sewed the pieces partially and left 3" or so unsewn. On the right half of the quilt the light fabric was the partial seam and the dark fabric was toward the outside so I sewed the entire piece.
I would press the partially sewn pieces close to where the stitching stopped

Here is the top before I joined the two halves together. You might notice on the left half that there is a gap between the last fabrics at the top. The points are going to be cut off so that gap didn't matter. When I sewed them partial seams together, I started at the top. I t was surprisingly easy to sew each partial seam to join the two halves together.

After the top was sewn together I needed to trim the quilt. At the sides I cut off the point and now have lots of triangles I can make HSTs. The top and bottom, well that is a different story. Since I used bigger pieces of fabric to make my herringbone design, the points were big! I will just put them in my scrap pile.

I have started my second prototype herringbone baby quilt. I call it a prototype because I came up with the thought that I only wanted to do one partial seamed row in the quilt and I am trying to get the starting size of the pieces the right size so I don't trim off so much fabric. I am going from 4.5" x 18.5" pieces on the first quilt to 4.5" x 17.5" for the second quilt. With this next quilt I will be able to see what that 1" less per piece will give me in the width and if it affects the length. I am not concerned with the length as I have plenty of leeway. I have zero patience to draft the quilt out on paper! I like to just get in there with the fabric and experiment. I would rather cut and sew than spend any time drafting drafting!

Let me know if you have any questions. I use Victoria Findley Wolfe's book Quilt Magic as my starting point. I can't even tell you what size her book tells to cut the pieces.

Friday, November 3, 2017

Almost enough cut

I dug deep in my stash and came up with a few more fabrics for the pink herringbone quilt. here is what it looks like now.

I found one more light fabric this morning while I was cleaning up so I need to try and find one more dark. That will give me 12 horizontal rows and I think that will be enough for the length. I will be able to start sewing this together tonight if I can find that dark. I was tempted to buy some fabric yesterday, some pinks, blues, and yellows, but I resisted. As much as I have tried not to buy fabric this year, I still bought a bunch of flannel and skull fabric for backings that were on sale at a great price. Overall I still have bought more fabric than I used even with 16 finishes so far! Of course with t-shirts quilts I only count the backing and the binding as reducing my stash.

I will probably spend most of my weekend in the studio as we are suppose to get more rain. It poured like crazy last night. Where was this rain in August when we needed it? LOL!!

I dropped off the wool quilt to my brother, Mike, who will deliver it to my brother, Bob, today. I am anxious to hear if it is warm enough for him.

Have a great weekend!