I have two Harley t-shirt tank tops in the pile of shirts for the Harley quilt. I wanted to use them, but the cut in for the tank needs filled in so I can square them up. Here is how I did it. First, I took off the binding around the armholes. I didn't just cut it off because I didn't want to lose any more fabric. There was only two rows of stitching and it didn't take too long to get it off.
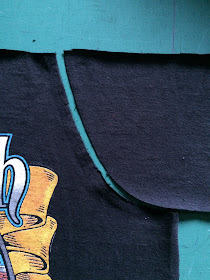
Then I cut off the bottom of the front and used that material for filling in. Here I have the filler piece face up and laying under the tank top. I have the tops of both layers lined up - this is important because then I will be able to match the top edges so the curves can be sewn together.
Next I traced the curve of the tank top armhole with my rotary cutter cutting the filler piece.
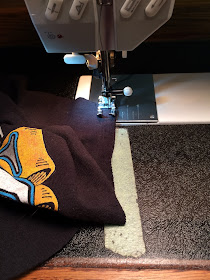
Ready to sew. For this I have the pie piece on top and the crust on the bottom.
As I sew I match the edges being careful not to pull and stretch the fabric. I also reach behind and gently move the already sewn seam around to the side to free up the fabric so it is easier to match the two pieces as I sew.
Seam sewn and pressed. I should have pressed the seam open to spread out the fabric. I was in a bit of a hurry and wasn't thinking. It will be easier to quilt this with the seam pressed open.
Now to do the other side. Layer and line up tops
Trace curve
Sew - this time the crust is on top - yes, I do it both ways. I am crazy like that. The difference being that you want to move the edges together and not stretch the crust edge. I sometimes use a seam ripper to help ease and hold the fabric in place as I stitch a few stitches at a time, then adjust the fabric, and stitch as few more stitches.
Done!
I worked on the R.E.M. quilt a bit too. I got partway around this shirt, but then I ran out of the lime green thread I was using.


No comments:
Post a Comment