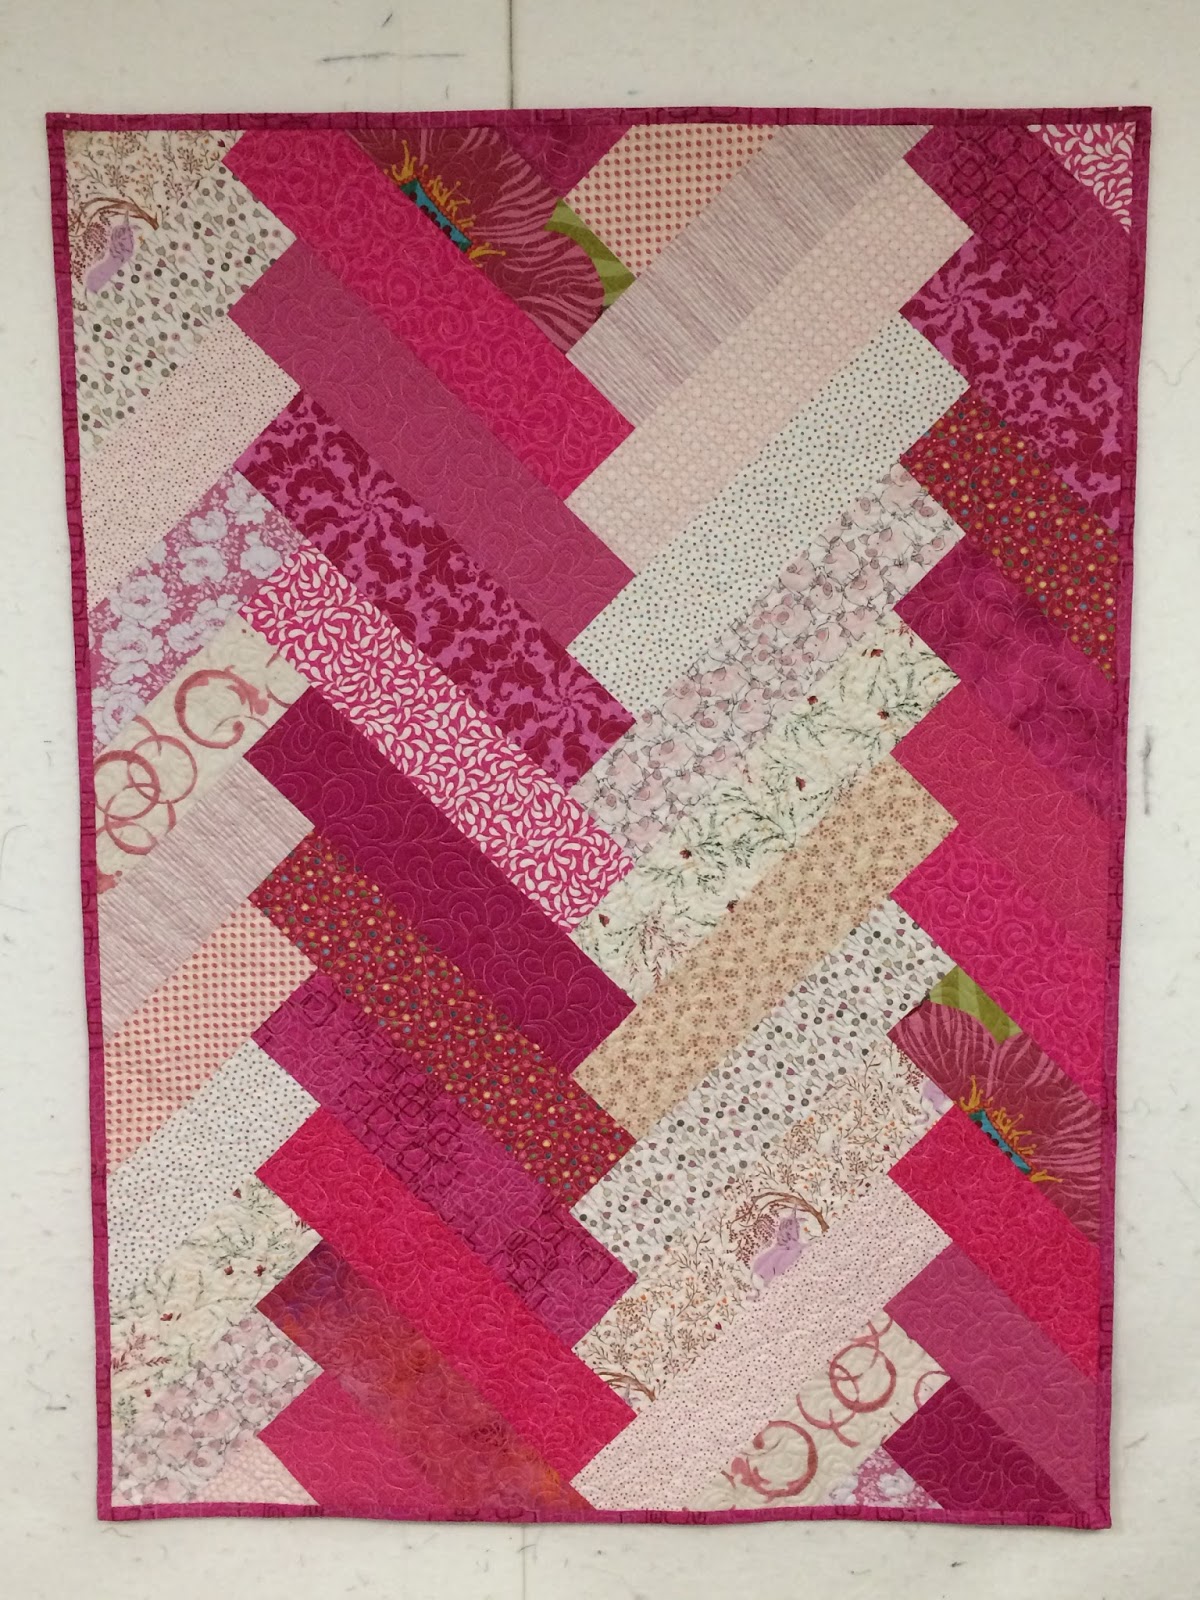

I had cut my pieces 4.5" x 18.5". It took me an hour to sew each half together and a half hour to sew the partial seams down the middle. I think that is quick for a baby quilt that looks like a lot more work went into it. Here is a bit of the process I did:
I stated sewing from the bottom. I sewed the light colored piece to the dark colored piece and press the seam toward the light colored piece. Here I am getting ready to add the next light colored piece.

Every time I added another piece I would lay it in place as shown here where I have the light colored piece on top.
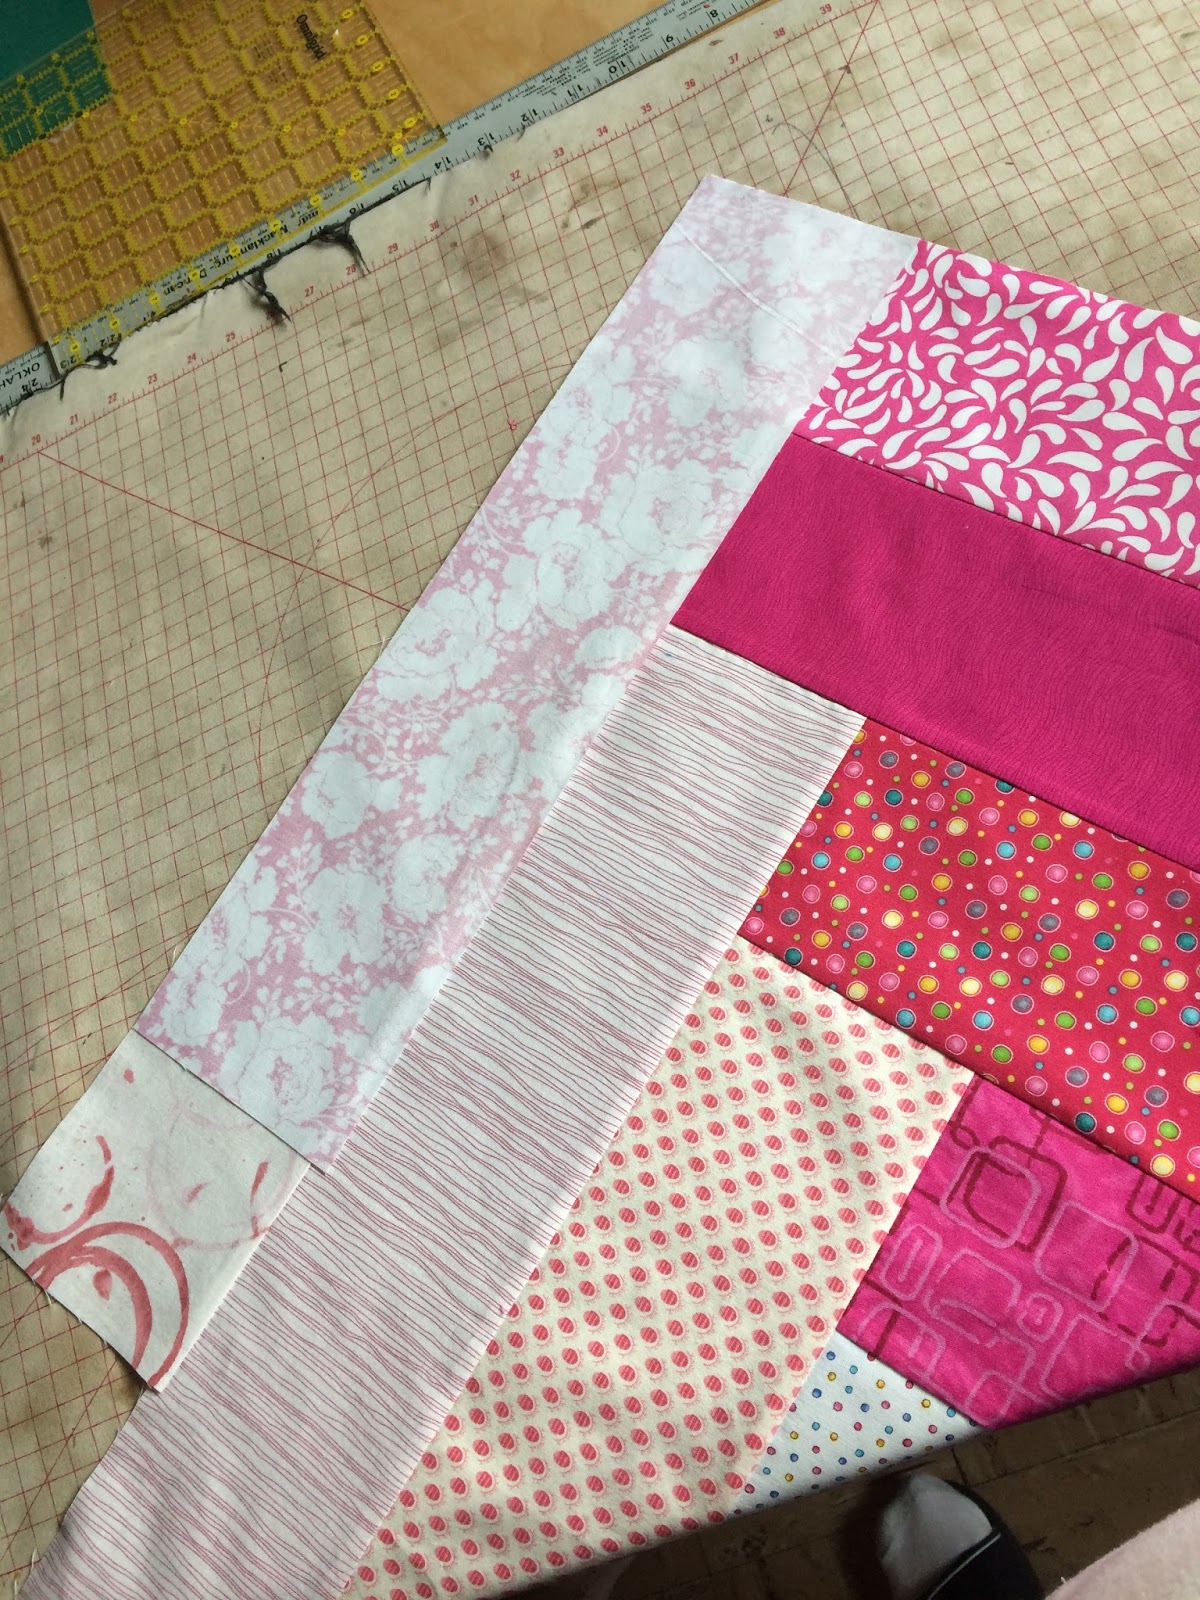
Then I pressed the light colored piece down to make it stick a bit to the previous piece. I am not one for pinning much and the friction between the two pieces was enough to hold the fabric in place. My machine has an integrated walking foot so I don't have to worry about the top fabric being pushed.

Now one this row when I sewed the pieces together the row of light fabrics was the outside row so I sewed all the way to the end of the piece. The dark row was the partial seam section so I only sewed the pieces partially and left 3" or so unsewn. On the right half of the quilt the light fabric was the partial seam and the dark fabric was toward the outside so I sewed the entire piece.


Here is the top before I joined the two halves together. You might notice on the left half that there is a gap between the last fabrics at the top. The points are going to be cut off so that gap didn't matter. When I sewed them partial seams together, I started at the top. I t was surprisingly easy to sew each partial seam to join the two halves together.

After the top was sewn together I needed to trim the quilt. At the sides I cut off the point and now have lots of triangles I can make HSTs. The top and bottom, well that is a different story. Since I used bigger pieces of fabric to make my herringbone design, the points were big! I will just put them in my scrap pile.


I have started my second prototype herringbone baby quilt. I call it a prototype because I came up with the thought that I only wanted to do one partial seamed row in the quilt and I am trying to get the starting size of the pieces the right size so I don't trim off so much fabric. I am going from 4.5" x 18.5" pieces on the first quilt to 4.5" x 17.5" for the second quilt. With this next quilt I will be able to see what that 1" less per piece will give me in the width and if it affects the length. I am not concerned with the length as I have plenty of leeway. I have zero patience to draft the quilt out on paper! I like to just get in there with the fabric and experiment. I would rather cut and sew than spend any time drafting drafting!
Let me know if you have any questions. I use Victoria Findley Wolfe's book Quilt Magic as my starting point. I can't even tell you what size her book tells to cut the pieces.
2 comments:
That turned out really cute!
I like how this turned out a lot!
Post a Comment