
So if I subtract 31 from 42 I get 11". Then divide 11" in half and you get 5.5". So that means the borders need to be about 5.5". I will lose another 1/4 of inch of the border when I sew the border on and I will lose 1/4 of an inch off the size of the blocks for a total of 1" in the width of the top so my backing will be plenty wide.
I gathered up the scraps I had left from the log cabin quilt I put together last week and started making border pieces. I also cut a variety of pieces from the fabrics I used in this multi layered quilt. I pressed the first two pieces and layered them both face side up. They measure about 7" which is wider than I need, but that gives me some wiggle room.

Next trim one edge straight.

Now cut the layers into chunks. I free cut these - no ruler. I usually start on the right and slightly pull the length of fabric so I can see where I cut the previous cut to judge where I want to do the next cut.

Next sort the pieces into two rows.


Stack the pieces so you can move the rows to the sewing machine. I stack the rows with the left hand piece on the top. This is important because you are going to sew the pieces from left to right.

Here are the first two pieces.

Flip the right piece over the left piece with right sides together.

Sew the two pieces together matching the cut edges up as you go. Since these a free cut pieces the edges won't match up when they are laid on top of each other so you have to go slow and match them up as you sew working the top and bottom pieces gently without stretching, tugging, or pulling.

Add the next piece. In this case when I flipped the next piece over to add to the row I get a dog ear at my straight edge. If you have quilted for a while you have seen this when you sew triangles together. I am showing you the underside also so you can see that dog ear. What is important is to line up the cut edges of the seam line.


Here you can see after I sewed the pieces I get a straight edge at the top.

The two rows sewn

Now I want to join the two rows so I slightly overlapped them.

I traced the outline of the light blue piece and cut the darker blue piece. Notice that they match at the top. Sew.


Here I had a scrap that I want to add to the end of the row.

Overlap the pieces

Cut thru both pieces

See how they are uneven at the top? I cut a little nip across to make them even so the pieces can be matched up for sewing.


Here is row all sewn together

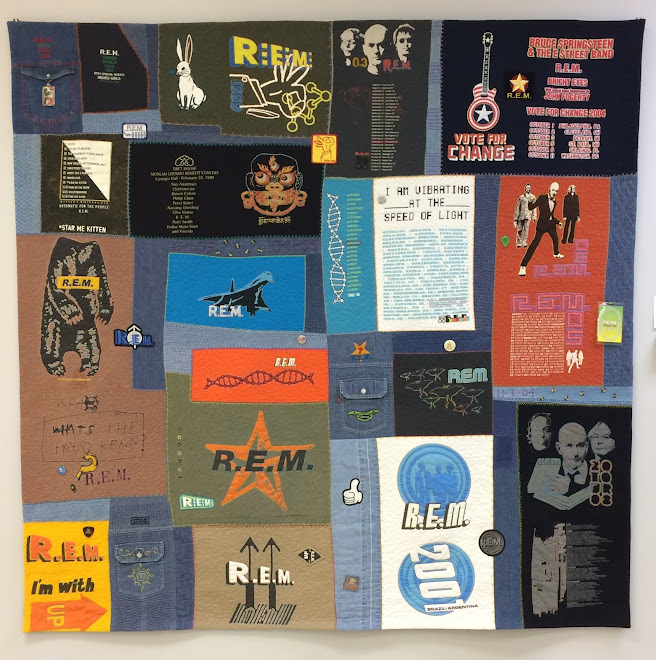
I sewed a bunch of border pieces together last night and this is what the quilt looks like now. I will have to add a few pieces here and there to make enough border to go around the blocks. I will trim the borders on one side to match up to the blocks, but I won't trim the outside border until I am ready to square up the quilt.

Now if you are thinking a lot of fabric is wasted with trimming, here is my pile from this quilt. I don't think there is much waste. The couple larger pieces of scrap I used last night to sew on after I oiled my machine.

One more tip: make sure you have a nice sharp blade in your rotary cutter. If you use a blade that you have been using awhile it will be dull enough that it won't cut cleanly thru fabric that is not held down by a ruler. I keep a separate group of blades that are good for cutting with a ruler, but too dull for free cutting then switch them as needed for whatever task I am doing.
1 comment:
Nice! Thanks again. Also thanks for the tip about the blades, I never thought about doing that.
You are too smart!
Post a Comment